Tuesday, 12 April 2011

Building a Rally Car – Part 2a: Suspension and brakes

In the first part of this series of blogs I covered rally car bodyshell preparation. Today, it’s suspension and brakes.

So why do rally cars need special suspension and brakes? Firstly, rally cars drive at high speed over all sorts of surfaces, from smooth tarmac to the roughest of rocky gravel roads. If the suspension can’t absorb all those bumps then the car will take such a pounding that it can break the car and could also rattle the teeth out of the crew! Oh, by the way, I have driven a rally car with broken suspension at high speed on a gravel forest track and the vibrations were so bad my vision was blurred making it hard to see where we were going!

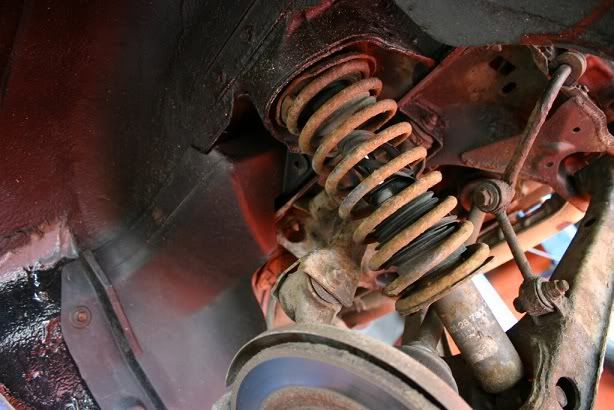
There are basically two parts to the suspension. Firstly there’s the big metal spring which compress as the wheel hits a bump and it absorbs all that energy so it’s not transferred to the car. If you only had springs, the ride would get quite bouncy, so inside the spring you have an oil filled tube called a damper. 

The damper allows the spring to compress, but prevents the spring from recoiling too quickly so ‘dampens’ the rebound effect. That’s basically how suspension in a standard road car works, but a rally car suspension is a bit more sophisticated in that it is three-way adjustable. This means there are three types of bump you can set up the suspension for, depending on the type of surface you’re driving on.

1) High Speed damping. This allows you to adjust the suspension so the wheels stay on the ground when driving over small bumps like ruts and potholes at high speed. This setting is to absorb all the small vibrations that would otherwise blur your vision and rattle your teeth out!

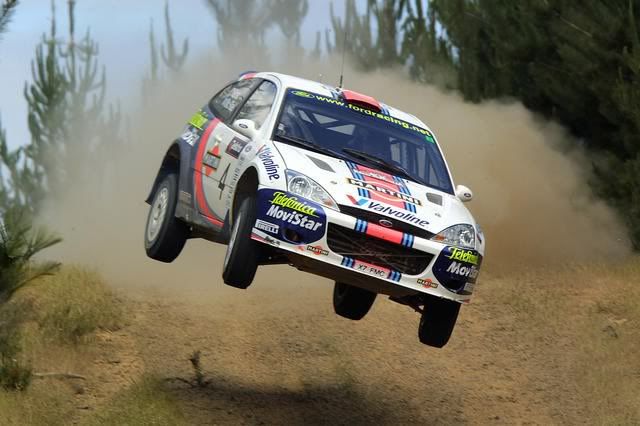
2) Low Speed Damping. This setting is for landing the car in a stable manner after jumping over a crest. Rally cars are frequently off the ground when being driven so fast, so when the car lands it needs to be cat-like and not go splat like a jelly! This setting can tune how soft you land without crashing down too hard.

3) Yaw and Pitch. As a car accelerates, brakes or goes around corners, it will lean backwards, forwards or side to side and this makes the tyres work less efficiently. This setting allows you to reduce this effect, keeping the car stable and as level as possible, thus keeping all four tyres evenly on the road.

Ok, that’s covered quite a bit on suspension, so I’ll talk about brakes in the next part 2b soon. See below how rally car suspension compares to standard road car suspension. Can you spot the springs and the dampers?

 
Road car damper and spring

Rally car suspension removed for repairs. Notice how much longer
it is. This allows for more movement for absorbing big bumps!

       Colin McRae showing why rally cars need good suspension!!


Tuesday, 5 April 2011

Building a Rally Car – Part 1: Body Preparation


This is the first in a series of blogs on how a rally car is built and what makes it different from cars you see driving about every day on the roads.

A rally car has to survive being driven at high speed over all sorts of road surfaces. I say roads, but these could range from nice smooth tarmac roads, to rough rocky gravel tracks, covered in ice, snow, mud or dust...it's all part of the challenge that is rallying.

So, how do you go about building a rally car to survive these conditions?

When you see a rally car, it looks pretty much like any car you might see driving down the street. But under the skin it's an entirely different beast!

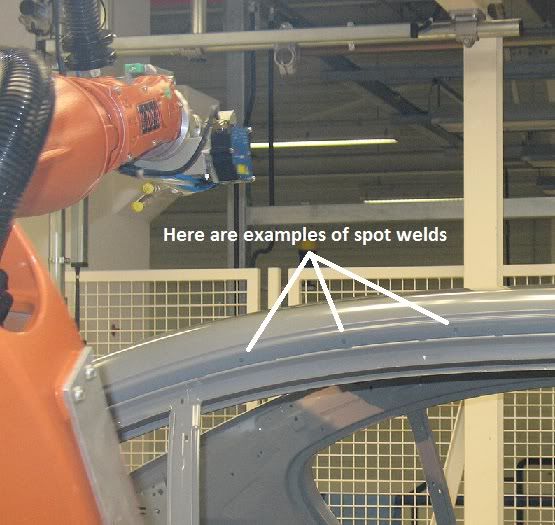
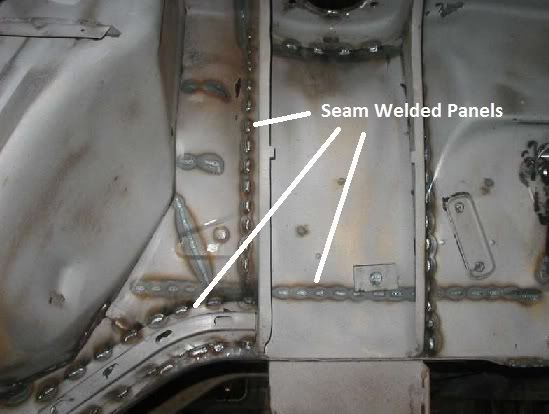
When cars are built in the factory, all the metal panels are spot welded, usually by robots. Welding in this way is strong enough for general use on everyday roads, but the extreme vibrations on a rally track can cause the body of your car to fall apart! So, one of the most important parts of preparing a rally car is to add extra strength to the body. To do this, everything is removed from the car, leaving just the shell. Then, by hand, a weld (which is really a hot metal glue!) about 3cm long is made every 3cm over every panel on car. This painstaking process is called seam welding, because it looks like a seam you would get when sowing cloth and it can take days to complete. 


Spot Welding Robot

Seam Welding
The result is a much stronger body shell, able to withstand extreme vibrations.
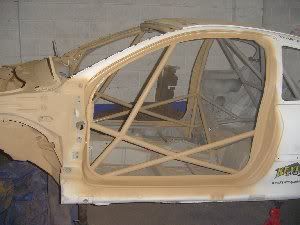
Next stage of the body preparation is the roll cage. This is a safety feature that protects the driver and co-driver if the car has a nasty crash, which in rallying is quite frequent! The roll cage is basically a metal cage made up of strong steel bars which are welded together to form strong triangles. This adds immense strength to the body of the car, so if it is involved in a big crash, the crew inside the car are protected.

To complete the body preparation, paint is applied to make it look nice again and once that is dry, the body is ready for the next stage. This we will cover in Part 2: Suspension and Brakes